Field guide · 12 minute read
Valheim Building Stability Guide: Support Colors and Tall Builds
Valheim building stability is easier to solve when you stop treating it like real-world weight. A wall does not become safer merely because several posts sit beneath it, and a decorative brace does not help unless it creates a better connected route back to terrain or another strongly supported piece. This guide turns the color display into a repeatable diagnosis for ordinary houses, wide roofs, stone upper floors, and tall survival builds without promising one universal height limit.
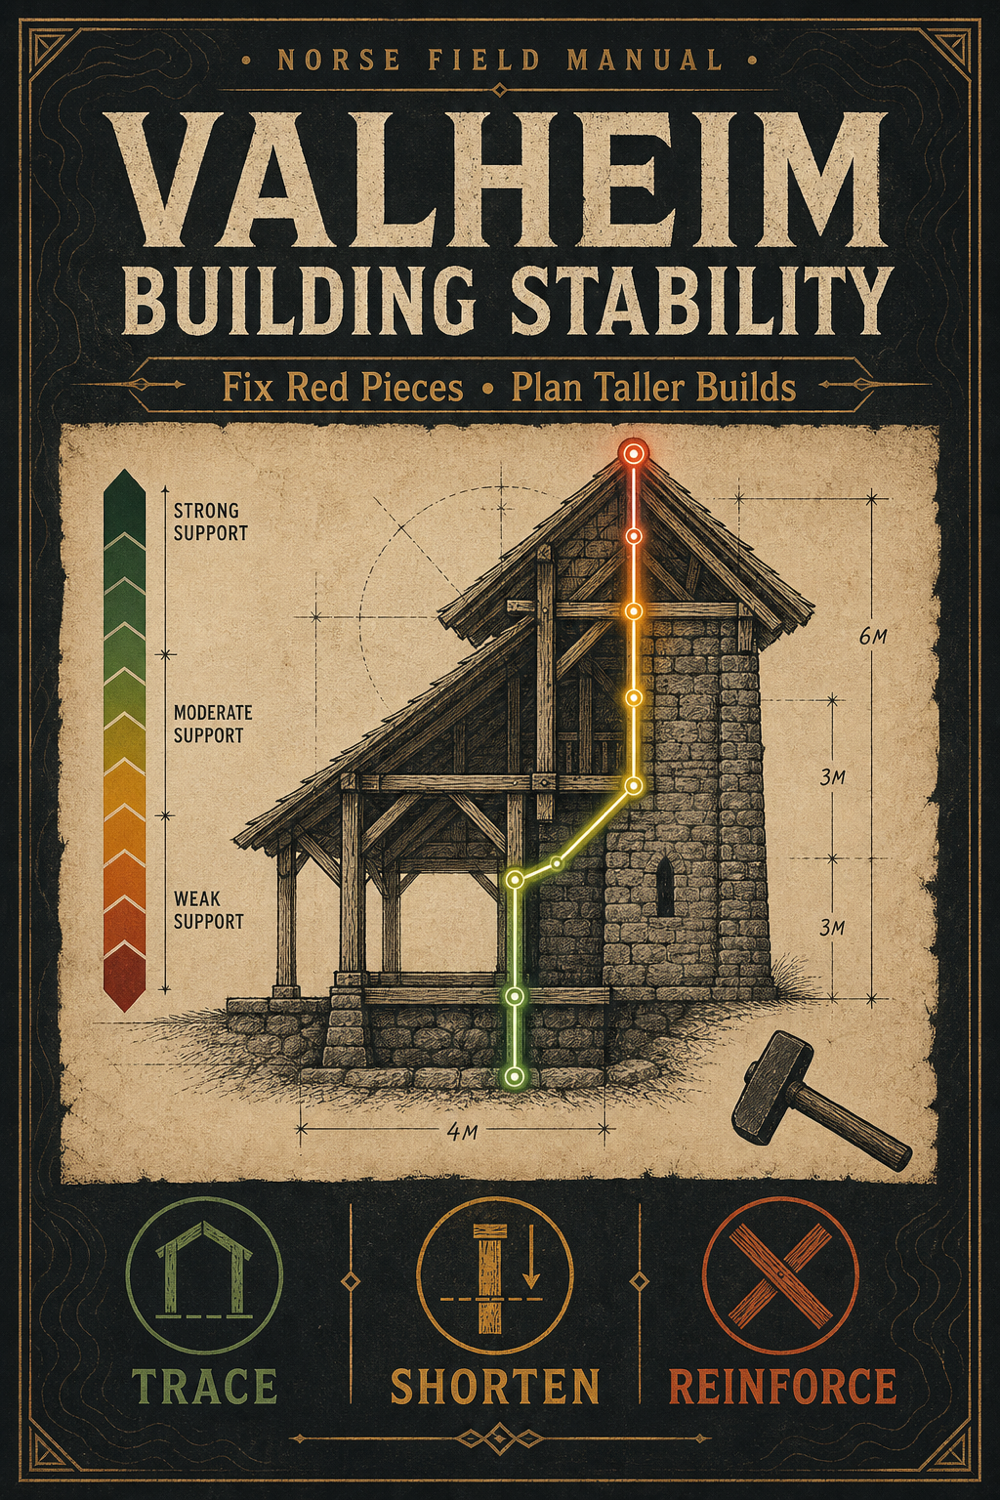
Read support colors as a path, not a weight meter
Equip the hammer and point at a placed piece to read its support color. Blue indicates a piece that the game considers grounded. Green, yellow, orange, and red show support becoming progressively weaker along the best connected route. Red does not automatically mean “remove this now.” A red piece can remain in place; it means the next extension has little or no support margin and may fail after the stability calculation updates.
The important mental model is a relay. Each piece receives support from a connected piece and passes a reduced amount onward. Material, connection angle, and distance affect how useful that relay is. The game is not totaling every post under a floor like a structural engineer calculating distributed load. Several weak routes do not necessarily combine into one strong route, so adding more of the same braces can leave the target color unchanged.
Use the colors to locate the break in the chain. Start at the problem piece and inspect connected parts toward the terrain. If the colors become steadily weaker, the route is simply too long or indirect. If a supposed foundation is not blue, the problem begins at the bottom: the piece may be resting visually on a floor, rock, or uneven surface without receiving the grounding connection you expected.
- Blue: directly grounded and the best starting point for a support route.
- Green through orange: usable support with decreasing room for more pieces.
- Red: often stable itself, but commonly unable to support another extension.
Diagnose a red piece before adding more supports
First ask whether the red piece is actually the failure. If it stays in place after the structure finishes recalculating and you do not need to extend beyond it, it may be an acceptable endpoint. The real problem is often the roof tile, wall segment, or floor piece attached after it. Waiting a moment matters because a newly changed structure can collapse in stages as support updates move through the connected pieces.
Second, follow the strongest-looking color back toward blue. Look for a long horizontal run, a chain of angled roof pieces, or a vertical column that begins on an ungrounded floor. Replace the route, not the symptom. Moving one post so it connects continuously to terrain can help more than placing four posts that begin on the same weak second floor.
Third, test one change at a time. Add a temporary ground-connected post near the target, wait for the colors to settle, and inspect whether the problem piece improves. If it does, you have confirmed a path problem and can redesign the permanent support. If it does not, check snapping and contact points before spending iron or rebuilding the room. A brace that appears to touch can miss the intended snap or connect to the wrong neighboring piece.
- Confirm whether the red piece falls or merely marks the end of the stable span.
- Find the nearest blue piece and inspect the entire connection between it and the target.
- Use one temporary test support, then wait for the color calculation to finish.
Choose the repair that changes the support route
A useful repair does one of four things: grounds the route correctly, shortens the route, makes it more vertical, or introduces a stronger material at the right point. Lowering a roof ridge by one segment can be the cleanest fix. Moving an interior wall beneath the ridge can turn decoration into a continuous support line. Narrowing a wide open span can solve the problem without changing the exterior at all.
Material upgrades are valuable only when connected properly. Core wood can carry early structures farther than ordinary wood in many layouts. Stone creates new possibilities for wood built from it, while wood iron beams can extend strong support through later builds when they form an unbroken connection back to the ground. Attaching a powerful material to an already weak endpoint does not magically reset every piece beyond it.
Prefer a visible structural story over hidden patchwork. Align posts with walls, turn a support column into a stair enclosure, or place a roof-supporting wall where it also divides storage from living space. If iron is scarce, redesigning a span is usually more economical than hiding iron throughout a structure that never needed that height. Save the stronger material for the continuous spine or the exact transition that creates the improved route.
Plan wide roofs from the ridge down
Wide roofs usually fail near the ridge because both sides arrive there after a long angled route. Before filling the roof, build one test rib from the eave to the planned ridge and inspect its final color. If the rib already reaches red before the peak, repeating it across the building will reproduce the failure. Lower the pitch, narrow the room, or introduce a ground-connected ridge support before committing the full material cost.
The cleanest support often begins at the floor plan. Put a wall, chimney mass, stair tower, or line of posts beneath the ridge, and make sure that element continues to terrain rather than stopping on a weak upper floor. A dramatic open hall is possible, but it needs stronger long-span planning than a house with rooms whose walls naturally shorten the route.
Do not let smoke planning fight the structure. Reserve a chimney or vent path while laying the foundation, then place the ridge support around it. Retrofitting both ventilation and stability after furnishing the upper floor creates avoidable conflicts. The Comfort Base Planner can help reserve the fire, bed, work, and circulation zones before the roof geometry becomes fixed.
- Build and color-check one complete roof rib before copying it.
- Carry the ridge support continuously through upper floors to terrain.
- Reserve smoke ventilation and stair openings in the floor plan, not after the roof fails.
Plan tall stone builds around a continuous spine
Stone encourages players to think in terms of heavy walls and extra arches, but the same path diagnosis still matters. Build upward from confirmed grounded stone, overlap and connect the wall courses deliberately, and check colors as each level rises. An arch can bridge an opening when it improves the connected route; placing another arch under a red cap does not guarantee a stronger result if both sides are already near their limit.
For a taller project, decide where the support spine will run before placing decorative windows and upper floors. That spine may be a sequence of properly grounded stone, a reinforced core using later materials, or a terrain-backed tower. Keep it continuous. Starting an iron-supported section on a weak wooden floor wastes the material because the lower connection remains the bottleneck.
Prototype a single bay at full intended height. Include the window or doorway, upper floor edge, and roof transition that will repeat across the building. If that bay works after the colors settle, repeat it at a regular spacing. If it fails, the small prototype is cheap to revise. This is more reliable than completing an entire castle perimeter and discovering that every second-floor cap shares the same unsupported route.
Use a five-minute stability repair route
When part of a build fails, stop replacing the same fallen piece. Clear loose sections so the remaining colors are readable, repair nearby damage, and begin at the terrain connection. Confirm the foundation is blue, then move piece by piece toward the failed location. The first abrupt change in color is where the route needs attention.
Add one temporary vertical support from confirmed ground as close to the failure as the floor plan allows. If the target improves, decide whether that support becomes a wall, post, chimney, or stair core. If the color does not improve, verify that the pieces actually snap together and test a shorter or straighter connection. Remove failed experiments so they do not hide which route is active.
Only after the route works should you restore cladding and decoration. Recheck from the bottom after any opening, remodel, or material substitution. Removing one ordinary-looking lower piece can disconnect a large area several steps away, and the collapse may arrive after a delay. Keep a small material reserve nearby while remodeling so diagnosis does not turn into repeated gathering trips.
- Clear the failed endpoint and wait for the remaining structure to settle.
- Trace from blue ground contact toward the first sharp color drop.
- Test one direct temporary post, then convert the working route into the design.
- Restore decoration last and recheck after removing any temporary piece.
Avoid support myths that waste materials
More posts are not automatically more support. A post that begins on a weak floor usually inherits that weak route. Larger pieces do not create a universal shortcut around the support system, and a structure does not become safe because it resembles a real truss. The game responds to its connected support calculation, not to visual realism alone.
There is also no single useful “maximum building height” for every project. The reachable shape changes with materials, angles, terrain contact, and the sequence of connections. Treat any fixed height quoted without a material and layout as a rough example, not a rule. A compact vertical tower and a wide overhanging hall can fail at very different points even when their peaks look similar.
Finally, do not use unreleased 1.0 previews to rewrite current stability advice. This guide is reviewed against the public 0.221.12 release and current community questions. If a future public patch changes building materials or support behavior, the diagnosis and metadata need a fresh source review before the guidance is updated.
Before you leave
Expedition checklist
- The lowest support pieces show blue and visibly connect to terrain or a valid grounded surface.
- One complete path from the problem piece back to blue has been inspected piece by piece.
- The target was allowed to finish recalculating before deciding whether it is stable.
- A temporary direct support was tested before rare materials were committed.
- Wide roofs were prototyped with one full rib and a planned ridge-support route.
- Tall stone walls use a continuous ground-connected spine rather than scattered late braces.
- Smoke vents, stairs, and open rooms were reserved before the support layout was repeated.
- Temporary braces are removed one at a time while colors are rechecked from the foundation upward.
Sources and scope
This independent guide is reviewed for the public game version shown above. Strategy recommendations are practical defaults, not official rules. Preview-build details stay excluded until they reach the public release and pass review. Report a problem through the corrections page.