Field guide · 10 minute read
Valheim Storage Guide: Organize Chests, Barrels, and Drop Zones
Valheim storage becomes frustrating when every return trip ends in a tour of the whole base. The fix is not one enormous warehouse or a perfectly memorized label list. It is a short flow from unloading to bulk storage to the places where materials are actually consumed. This guide builds that flow with current container facts, expandable categories, and a five-minute reset that works for solo worlds and shared settlements.
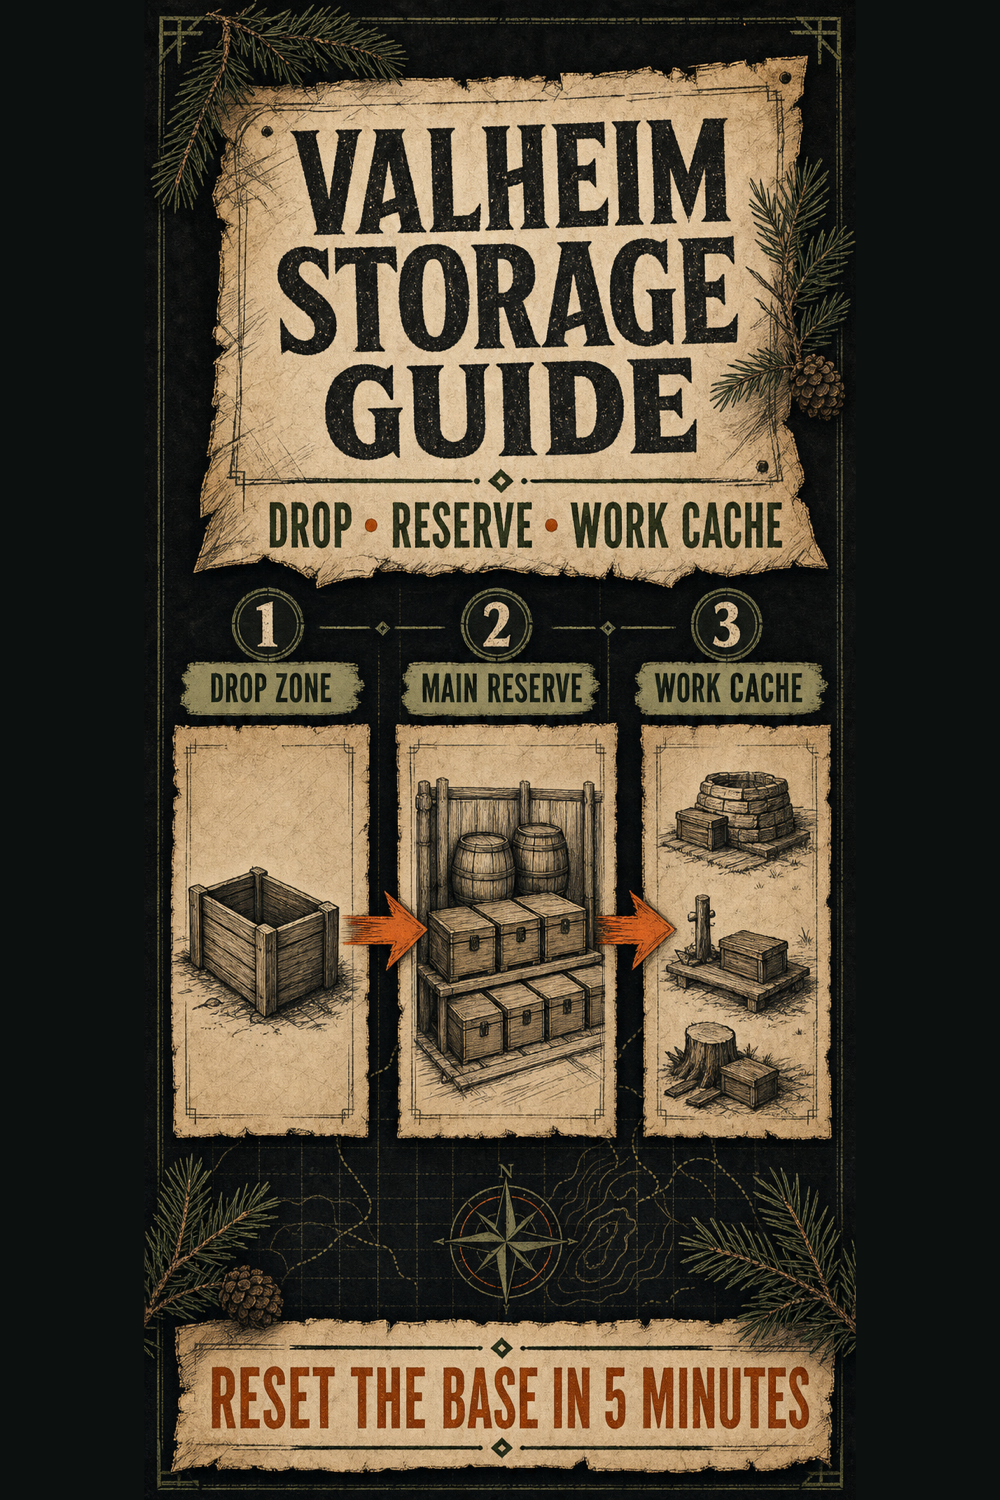
Build a three-layer storage flow
Layer one is the drop zone. Put two or three easy containers on the route between the main entrance, portal hub, and bed. One accepts portable expedition loot, one accepts building and crafting materials, and one can remain empty for urgent unloading. The purpose is speed: a player should be able to clear weight, repair, eat, and respond to a raid without placing random stacks in every room.
Layer two is the main reserve. Organize it in visible rows with room to extend sideways or upward. This is where full stacks, spare equipment, trophies, older biome materials, and future-project supplies wait. The reserve does not need to touch every crafting station. It needs a readable walking loop, consistent labels, and enough open slots that one returning player does not break the whole system.
Layer three is active storage beside the point of use. Keep current foods and mead ingredients near the cauldron, coal and metals near the forge, seeds and field tools near the farm, and boat materials near the dock. Refill these caches from the reserve. This three-layer flow reflects a recurring community pattern: quick drop-off, organized bulk storage, and small work caches reduce the long unload walk without requiring automation or mods.
- Drop zone: fast unloading with no fine sorting.
- Main reserve: labeled bulk stacks and slower-moving supplies.
- Active caches: the next few sessions of material beside each work area.
- Recovery stock: food and replacement gear kept outside the ordinary flow.
Choose containers by bottleneck
The current storage reference lists 10 slots for the basic chest, 12 for the barrel, 24 for the reinforced chest, and 32 for the black metal chest. Those numbers describe capacity, not the best layout for every room. Access direction, floor footprint, material cost, visibility, and the value of the stored item can matter more than the largest slot count.
Basic chests are the low-risk default because ten wood is easy to replace and the rectangular shape works in labeled racks. Barrels add two slots and fit compact corners, kitchens, and narrow work areas, but require a purchased barrel hoop. A same-day community comparison renewed interest in barrel density; use that as a design prompt, not a universal ranking. Test a two- or four-barrel module in the actual room before converting the whole warehouse.
Reinforced chests use iron, a material that remains useful across many progression stages. Place them where the extra capacity prevents a real bottleneck, such as metals beside the forge or high-throughput ingredients in the kitchen, rather than replacing every wooden chest immediately. Black metal chests offer the most listed slots and become attractive when black metal and tar are already routine. Upgrade a hot spot first, recover the old container materials, and keep the label and category unchanged.
- Choose a basic chest when low cost and repeatable shelving matter.
- Choose a barrel when a compact corner or work cache needs twelve slots.
- Choose a reinforced chest when twenty-four slots justify spending iron.
- Choose a black metal chest when thirty-two slots solve a proven late-game bottleneck.
Use categories that can split without a rebuild
Begin with broad categories that match how items leave the inventory: wood and construction, stone and terrain, ores and metals, animal materials, plants and seeds, food ingredients, cooked food, trophies, valuables, equipment, and expedition supplies. Give each category an adjacent empty position. The empty position is part of the system because it allows growth without moving every sign and chest.
Split a category only after it repeatedly fills or creates search friction. A plants chest can become seeds, forage, and farm crops; animal materials can become hides, creature drops, and feathers; construction can separate common wood, specialty wood, and stone. Keep the old category label as a row heading so the mental route still works. Avoid giving every newly discovered item its own container before its actual volume is known.
Organizing by biome can work well for the long tail of drops, especially in a shared base where players remember where an expedition happened more easily than every recipe. Use a hybrid model: stable functional categories for high-volume production and one overflow chest per biome for miscellaneous items. When a biome item becomes a repeated ingredient, promote it into the relevant kitchen, forge, or workshop cache.
- Construction: wood types, stone, resin, tar, and building supplies.
- Production: ore, metal, coal, refined materials, and station inputs.
- Provisioning: crops, forage, raw food, cooked food, and meads.
- Field kit: arrows, portal materials, boat materials, tools, and recovery gear.
- Archive: trophies, obsolete equipment, collectibles, and low-use biome drops.
Place storage on the work path
Draw the route before building the room. A normal return should move from dock or portal to drop zone, then past repair, food, and bed. Sorting should branch from that route instead of forcing repeated trips through doors, stairs, smoke, livestock, and decorative halls. If the warehouse is beautiful but every metal shipment crosses the kitchen, the floor plan is fighting the supply chain.
At the forge, keep unprocessed ore, coal, finished metal, and current upgrade materials in separate reachable containers. At the kitchen, separate raw ingredients, current cooked meals, and seed reserves so the last planting stock is not consumed accidentally. At the farm, store the cultivator or scythe, the next planting batch, and an emergency restart reserve in distinct places. The reserve belongs away from the field if a single raid could destroy both crop and seed stock.
The dock needs one empty unloading container and one recovery container with ordinary boat materials where practical. The portal hub needs a temporary return chest, but it should not become permanent mixed storage. Schedule its contents for the same reset as the main drop zone. Items that cannot use the chosen portal rule still need a clearly marked coast-to-forge route.
Set stock limits by use, not fear
A container becomes a useful limit when it triggers a decision. If resin, stone, or common wood fills its assigned space, decide whether a named project will consume it, whether a stack should become a buildable pile, or whether gathering that item can pause. Adding another chest automatically hides the production signal and makes the future sorting route longer.
Do not apply one cap to every material. Frequently consumed food inputs, fuel, arrows, portal materials, and construction staples deserve higher working stock than obsolete weapons or low-use trophies. Metal reserves should reflect the next station, tool, building, and equipment decisions rather than a vague goal of filling the warehouse. The crafting upgrade calculator can turn a planned upgrade into a concrete material target.
Keep one recovery set outside the normal equipment archive. It should contain familiar, replaceable gear, three usable foods, and the environmental protection needed to reach common danger zones. Do not store the premium gear and its only replacement in the same chest beside the most exposed portal. Storage is part of recovery design, not only housekeeping.
Make multiplayer sorting legible
A shared base needs fewer private assumptions. Use the same label pattern on every row and name drop containers by action, such as DROP — MATERIALS or DROP — FOOD, rather than by a player name. Place signs where an approaching player can read them before opening several containers. Keep the empty urgent-unload container visibly empty instead of quietly using it for overflow.
Assign ownership to systems, not possessions. One player can restock food caches, another can move metals from the dock, and another can clear expedition drops, while all reserve chests remain shared under the group’s rules. If nobody owns a reset, the drop zone becomes a permanent junk drawer. A short recurring task is easier to hand off than a complete warehouse reorganization.
When the layout changes, change one row at a time and preserve the old route until the new labels are ready. Moving every container during a group session creates duplicate stacks and lost recovery gear. Announce the new category, empty the old chest into it, and remove the old label only after the source container is clear.
Reset the base in five minutes
Minute one clears character inventory into the drop zone while protecting equipped gear, current food, and the next departure kit. Minute two moves food and farming items to their active caches. Minute three moves metals, coal, wood, stone, and crafting inputs to production rows. Minute four files trophies, valuables, old equipment, and miscellaneous biome drops into the reserve.
Minute five refills only the caches needed for the next named objective. Restock the three foods, arrows or meads, portal materials, and the tool required for that route. Repair equipment, leave the urgent-unload container empty, and write the next objective before logging out. Stop when the five minutes end; a useful reset restores the next session, not a museum-perfect warehouse.
If the reset repeatedly exceeds five minutes, diagnose one cause. The drop zone may be too far from the reserve, one broad category may need a split, labels may be unreadable, or active caches may be hoarding materials that belong in bulk storage. Change that single bottleneck and test the next three returns before rebuilding the entire base.
- 0-1 minute: unload safely and preserve the equipped kit.
- 1-3 minutes: refill food, farm, forge, and workshop caches.
- 3-4 minutes: file low-use and biome-specific items.
- 4-5 minutes: prepare the next route and leave one drop container empty.
Before you leave
Expedition checklist
- Two or three drop containers sit on the normal entrance or portal route.
- Main reserve rows have visible labels and at least one adjacent expansion position.
- Kitchen, forge, workshop, farm, and dock hold only active-use caches.
- Container upgrades solve a measured capacity or footprint bottleneck.
- High-volume functional categories are separated from miscellaneous biome overflow.
- Seed reserves and recovery gear are outside the failure domain they protect.
- Stock limits reflect named projects and repeated consumption rather than unlimited hoarding.
- Shared-world labels describe actions and categories instead of relying on one player’s memory.
- The urgent-unload container returns to empty after each reset.
- A five-minute reset ends with repaired gear, refilled supplies, and one next objective.
Sources and scope
This independent guide is reviewed for the public game version shown above. Strategy recommendations are practical defaults, not official rules. Preview-build details stay excluded until they reach the public release and pass review. Report a problem through the corrections page.